Unihertz Atom L/XL Type-C Interface Replacement Tutorial - Unihertz

Unihertz Atom L/XL Type-C インターフェイス交換チュートリアル

このチュートリアルでは、Unihertz Atom L/XL スマートフォンの Type-C インターフェイス アセンブリを交換するプロセスを説明します。

Unihertz Atom L/XL Type-C Interface Replacement Tutorial

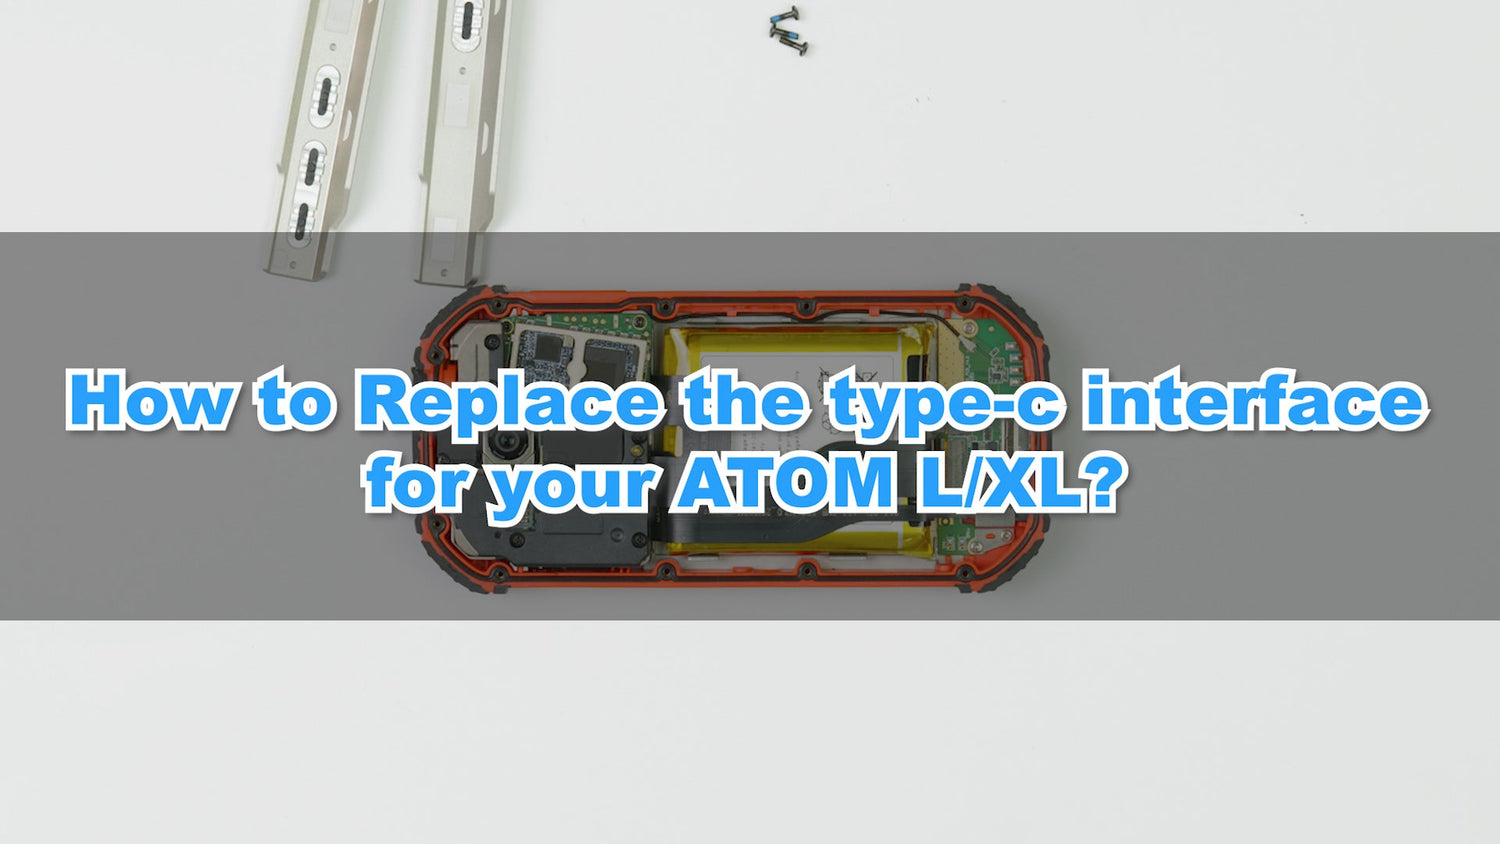
このチュートリアルでは、Unihertz Atom L/XL スマートフォンの Type-C インターフェイスを交換するプロセスを説明します。

Unihertz Atom L/XL スマートフォンの Type-C インターフェイスの交換を開始する前に、ガイド全体を読み、すべての手順を完了できることを確認することが重要です。それ以外の場合は、地元の訓練を受けた修理専門家を見つけて修理を行うことをお勧めします。

Unihertz Atom L/XL の Type-C インターフェースを交換する方法

Unihertz Atom L/XL の Type-C インターフェイスを段階的に交換する方法

Atom L/XL Type-C Interface Replacement Step 01

ステップ1

右側のサイドバーのネジ3本を外します
Atom L/XL Type-C Interface Replacement Step 02

ステップ2

右側のサイドストリップを取り外します
Atom L/XL Type-C Interface Replacement Step 03

ステップ 3

左側のサイドバーのネジ3本を外します
Atom L/XL Type-C Interface Replacement Step 04

ステップ 4

SIMカードトレイを取り外します
Atom L/XL Type-C Interface Replacement Step 05

ステップ 5

左側のサイドストリップを取り外します
Atom L/XL Type-C Interface Replacement Step 06

ステップ6

リアシェルのネジ10本を外します
Atom L/XL Type-C Interface Replacement Step 07

ステップ7

バックシェルを取り外します 防水接着剤に注意してください
Atom L/XL Type-C Interface Replacement Step 08

ステップ8

type-c FPC に 5 本のネジと固定ブラケットを挿入します。
Atom L/XL Type-C Interface Replacement Step 09

ステップ9

3.5mm ヘッドフォン ジャックを取り外します。 type-c FPC の 3 つのケーブル インターフェイスをこじ開けます。
Atom L/XL Type-C Interface Replacement Step 10

ステップ10

Type-C FPCを取り外します
Atom L/XL Type-C Interface Replacement Step 11

ステップ11

新しいtype-c FPCを取り出します(購入したtype-c FPCが携帯電話に適合するかどうかを確認してください)
Atom L/XL Type-C Interface Replacement Step 12

ステップ12

type-c FPC を取り付けます type-c FPC にケーブル インターフェイスを接続します 3.5 mm ヘッドフォン ジャックを修正します
Atom L/XL Type-C Interface Replacement Step 13

ステップ13

5 本のネジと固定ブラケットを type-c FPC に取り付けます。
Atom L/XL Type-C Interface Replacement Step 14

ステップ14

リアケースと10本のネジを取り付けます
Atom L/XL Type-C Interface Replacement Step 15

ステップ15

左側のサイドストリップを取り付けます
Atom L/XL Type-C Interface Replacement Step 16

ステップ16

SIM カード トレイを取り付けます。 左側のレールに 3 本のネジを取り付けます。
Atom L/XL Type-C Interface Replacement Step 17

ステップ17

右側のサイドストリップを取り付けます
Atom L/XL Type-C Interface Replacement Step 18

ステップ18

右側のサイドバーに 3 本のネジを取り付けます。

ステップ1

右側のサイドバーのネジ3本を外します
Atom L/XL Type-C Interface Replacement Step 01

ステップ2

右側のサイドストリップを取り外します
Atom L/XL Type-C Interface Replacement Step 02

ステップ 3

左側のサイドバーのネジ3本を外します
Atom L/XL Type-C Interface Replacement Step 03

ステップ 4

SIMカードトレイを取り外します
Atom L/XL Type-C Interface Replacement Step 04

ステップ5

左側のサイドストリップを取り外します
Atom L/XL Type-C Interface Replacement Step 05

ステップ6

リアシェルのネジ10本を外します
Atom L/XL Type-C Interface Replacement Step 06

ステップ7

バックシェルを取り外します 防水接着剤に注意してください
Atom L/XL Type-C Interface Replacement Step 07

ステップ8

type-c FPC に 5 本のネジと固定ブラケットを挿入します。
Atom L/XL Type-C Interface Replacement Step 08

ステップ9

3.5mm ヘッドフォン ジャックを取り外します。 type-c FPC の 3 つのケーブル インターフェイスをこじ開けます。
Atom L/XL Type-C Interface Replacement Step 09

ステップ10

Type-C FPCを取り外します
Atom L/XL Type-C Interface Replacement Step 10

ステップ11

新しいtype-c FPCを取り出します(購入したtype-c FPCが携帯電話に適合するかどうかを確認してください)
Atom L/XL Type-C Interface Replacement Step 11

ステップ12

type-c FPC を取り付けます type-c FPC にケーブル インターフェイスを接続します 3.5 mm ヘッドフォン ジャックを修正します
Atom L/XL Type-C Interface Replacement Step 12

ステップ13

5 本のネジと固定ブラケットを type-c FPC に取り付けます。
Atom L/XL Type-C Interface Replacement Step 13

ステップ14

リアケースと10本のネジを取り付けます
Atom L/XL Type-C Interface Replacement Step 14

ステップ15

左側のサイドストリップを取り付けます
Atom L/XL Type-C Interface Replacement Step 15

ステップ16

SIM カード トレイを取り付けます。 左側のレールに 3 本のネジを取り付けます。
Atom L/XL Type-C Interface Replacement Step 16

ステップ17

右側のサイドストリップを取り付けます
Atom L/XL Type-C Interface Replacement Step 17

ステップ18

右側のサイドバーに 3 本のネジを取り付けます。
Atom L/XL Type-C Interface Replacement Step 18